Kabloona Carver
Welcome to Kabloona Carver Web Site
I created this site to display the works I have done and to encourage others who might be interested, to try carving soapstone (or baleen).
To be clear: I am not indigenous and have never had any training in this activity at all. I can’t even draw decent stick people!
Also, I do not view any influences I have had as “cultural appropriation” but rather “cultural appreciation”.
I do not sell my pieces and only do this for my own satisfaction and relaxation.
(I am just learning this web software and hope to improve the site going along)
How I started
In 2018 my mother passed away and I inherited a small piece of soapstone that she had left over from
a craft class she had taken. She was quite a good artist herself creating very attractive water-colour paintings.
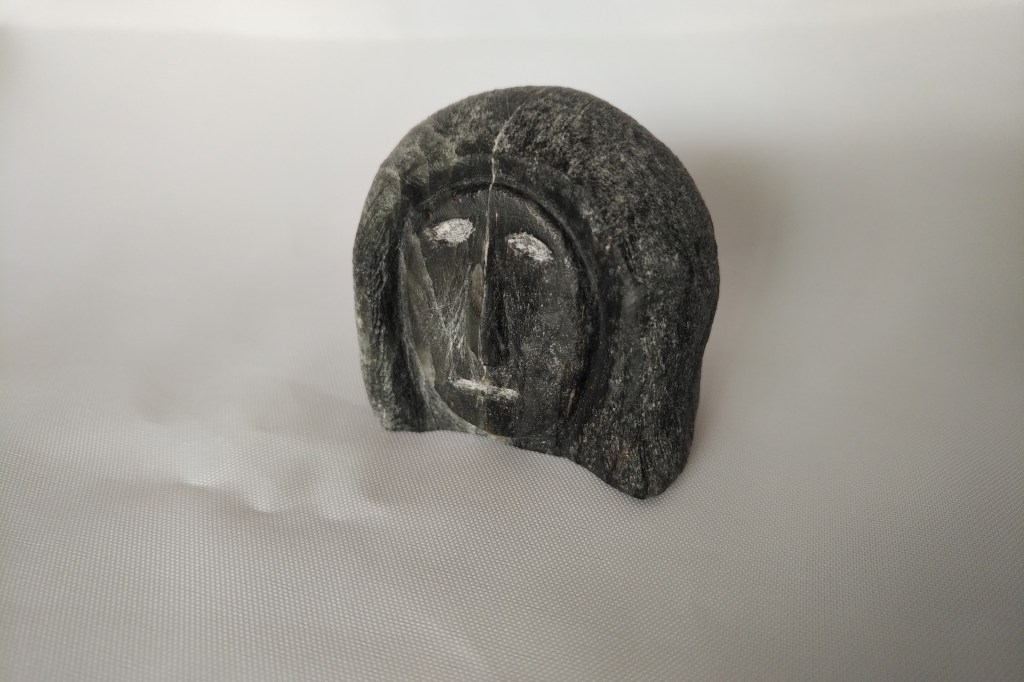
She had made a small “head” from a piece of this soapstone so I decided I would try my hand at it.
I watched a couple YouTube videos to get some basic instruction.
So I made a companion head.
Tools
The first tools I use are a hacksaw and a dremel. I cut out any chunks of stone that are superfluous to what
I intend to create. These I save to use in future projects.
The dremel is very useful for removing or sculpting larger areas, however, I try not to get carried away as
the dremel removes stone very rapidly and sometimes too much!
It does mean that I may spend more time filing, but I would rather do that then remove too much
stone too quickly – very difficult to put back!

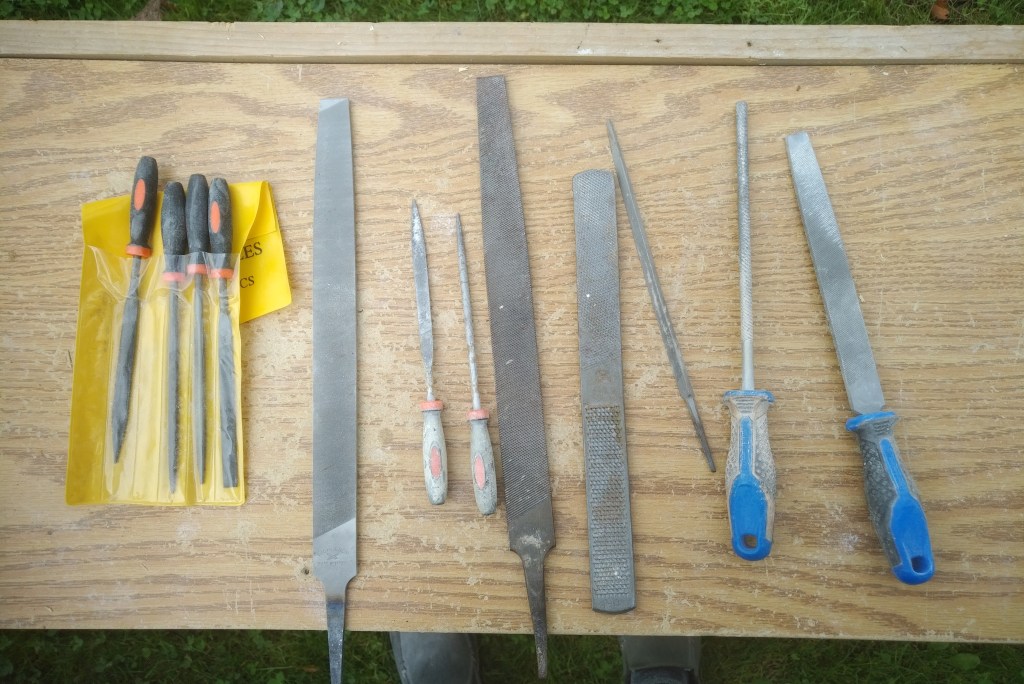
The files I started with I got from my father’s tool collection, which included a couple of my grandfather’s.
Then I learned from a wood carver about “rifflers” – small files used before moving to the sanding stage of a piece.
They create a very smooth surface and are useful in removing the “scratches” left by the files.
I learned about the “grades” of wet-dry sandpaper and utilize paper from 320 to 2500 grit progressing
through as many as eight sandings.

Initially I “finished” the pieces using linseed oil but on the recommendation of my soapstone supplier
I now use clear floor wax paste.
It does not “change” the colour of the pattern, whereas the oil did “darken” a little.

As mentioned, I have had no lessons in this at all and have learned by trial and error.
I can certainly say that with each project I have expanded my experience in this craft.
Accessories
Mask – the soapstone dust is so fine that I absolutely recommend wearing an N95 mask.
I do not wear the mask for the very “final touch-up” and the wet sanding as there is virtually no dust.
Gloves – two types – soft goat or pigskin – for handling the stone during the cutting, dremeling and filing stage.
Cloth glove for polishing and women’s nylon sockets for polishing.

Toothbrush – for cleaning the files as they become “clogged” very quickly affecting their usefulness and a small
regular paintbrush for clearing away the dust from the piece as you work.
A sharpie marker for marking the stone to define areas to be worked on.

Stages of Production
Determination of work. The small soapstone pieces sold by Lee Valley are 2”x2”x 4” and a good place to start.
What to carve? Start with something relatively simple like a bird or a seal and don’t try to
put too much “detail” and avoid “sharp corners”, as these are difficult to fine finish and wet sand.
The soapstone I purchase now does not come in regular rectangle or square shapes. I try to let the shape
and the final “pattern” of the stone guide my work towards the final product.
However, “adjustments” are always made as the work progresses for various reasons.
To determine the “pattern” of the stone use a spray bottle with water
– spray the stone and it will provide an excellent approximation of how the finished stone will appear.

Note: I work exclusively outdoors as the dust goes everywhere. On rainy days I can work under the eaves of my house.
I can do the final stage of polishing indoors.
With the hacksaw cut out any pieces that can be and save them for potential future use.
With the dremel you can then remove some other areas to help reduce filing. However, be prepared
as this causes a lot of dust quickly and it floats everywhere. I also wear extra eye protection
as small chips of the stone can fly around also.
I use the dremel sparingly as it removes material very quickly (and deeply) and it can’t be restored.
Filing and more filing. Using various types and shapes of files you now start to shape the stone to its finished product you had
visualized when beginning. As mentioned, various adjustments are needed along the way – be adaptable and very patient.
Use the sharpie to mark the stone for areas to focus on. I have found that I need to work on different parts of the stone
in a sitting to visualize the overall shape and provide some variety in the operation.
This is obviously the longest stage but also the most rewarding as you progress.
Sanding. I wet sand so I don’t need to be masked. It is very important that you have a constant supply of fresh clean water.
I run a hose into a bucket and then if the piece is small enough I immerse the entire piece into the water,
wet the sand paper and then begin. Sand until you “feel” no “resistance”.
If the piece is larger and heavier I use a small glass to scoop fresh water and then pour it over the area I am sanding.
I start with the 320 grit – do the entire piece and then let it dry. Once dry you can identify scratches and marks that can be removed
the riffler and then re-sanded. Do NOT try to file while the stone is wet. Then move up in the grade of the paper and I go as high as 2500.
At that point it is virtually like rubbing a cloth over the stone. I then let it dry for at least 24 hours before beginning polishing.
Polishing. I use Miniwax “natural” paste finishing wax. At this point I wear cotton gloves and I put the nylon socket over the cloth glove
on my polishing hand. Liberally apply the wax with a cotton cloth and then start polishing until the stone has a nice even shiny finish.
Be very cautious not to mark the stone at this point – even a finger nail will scratch the finish.
Chronology of Production
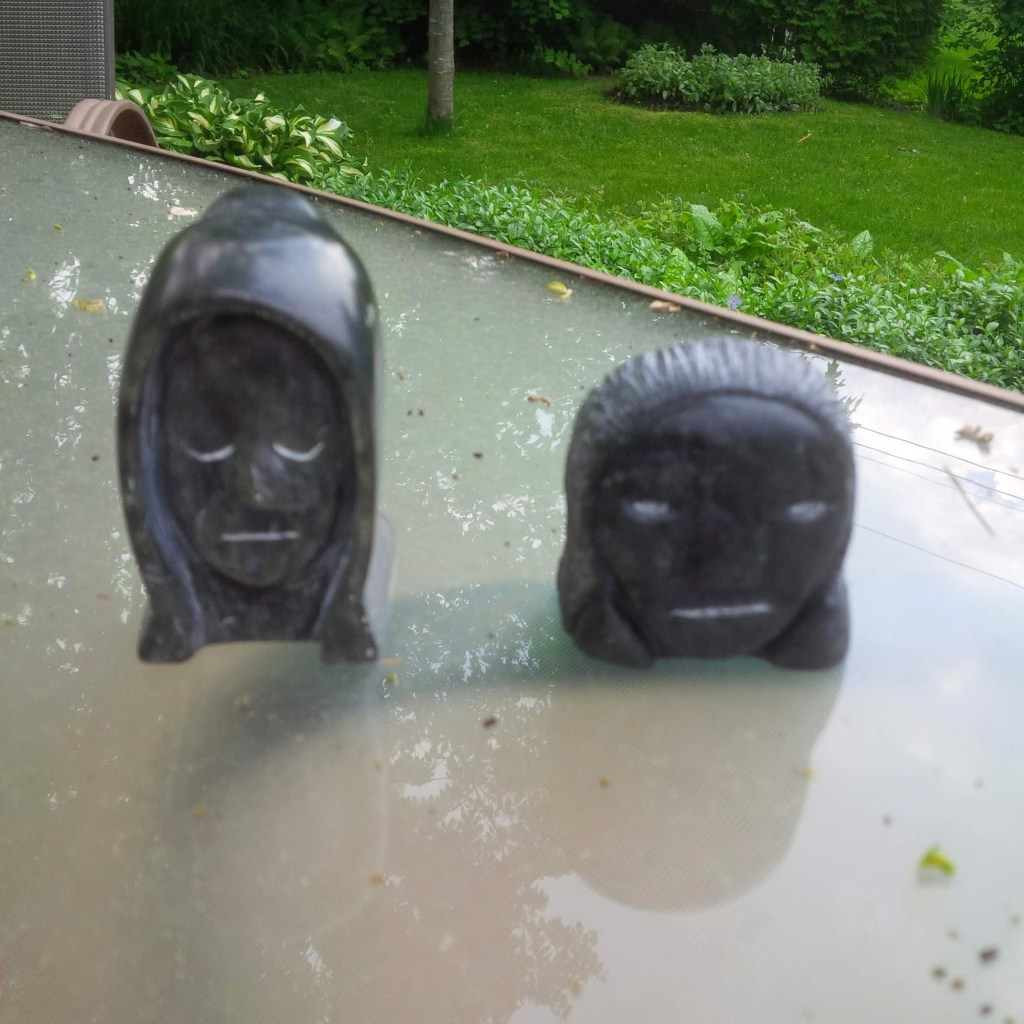
2018
The one on the left is my Mother’s and the other is my first effort.

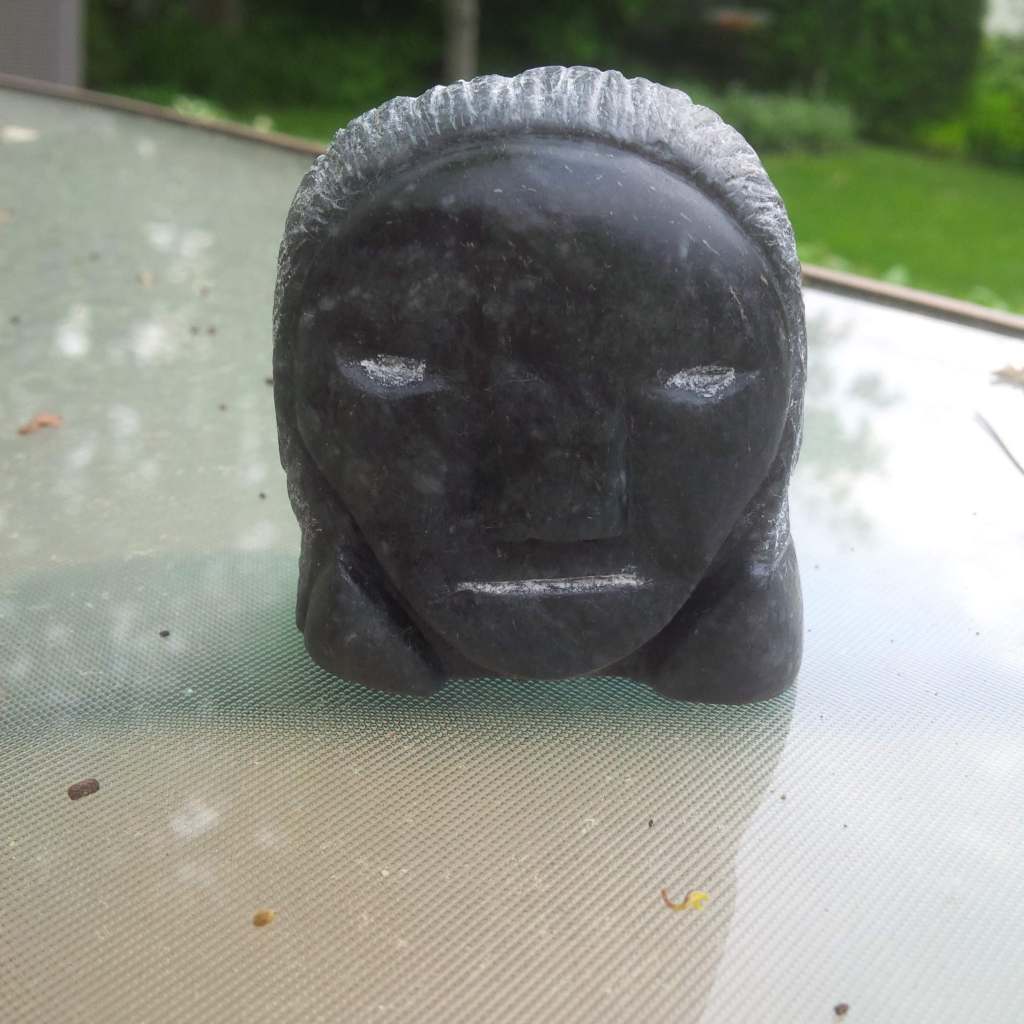
Close-up of my first. The “hair” is the original surface – left natural, unfinished.

This is a third head made of two different pieces of stone, but both from Lee Valley stones.
Little seal: first carving effort – tried to have a little too much detail, but learnt a lot.

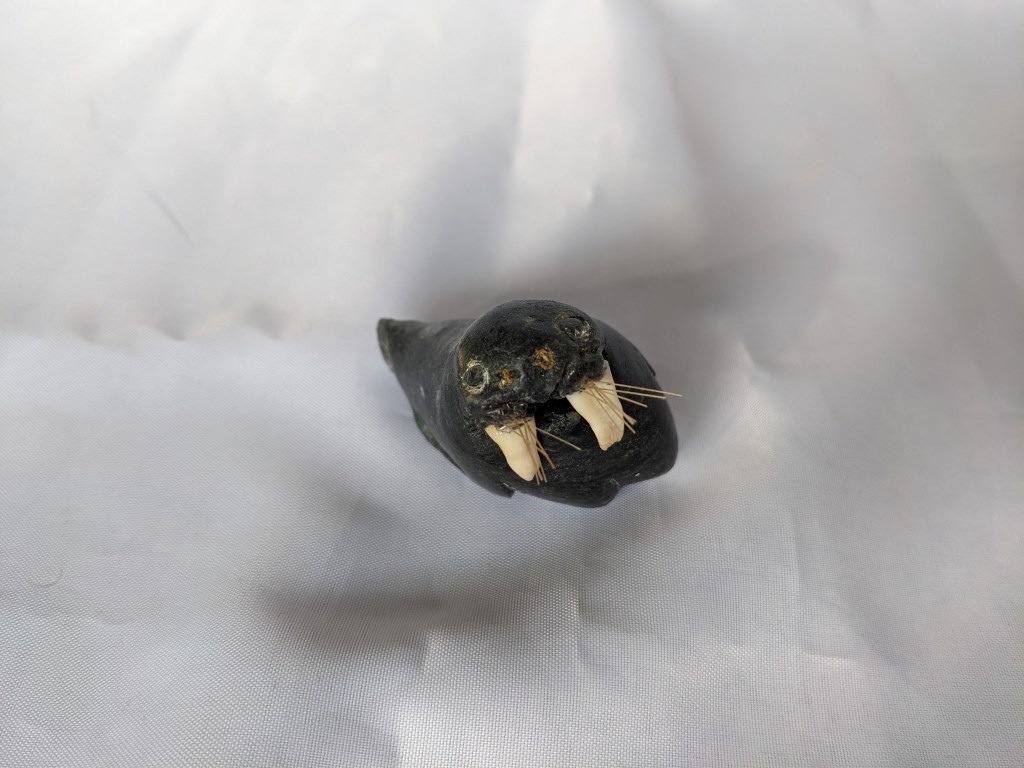
Little walrus: again, probably too much detail. The “tusks” are actually a walrus’s tooth from a lower mandible I have that cut in half.
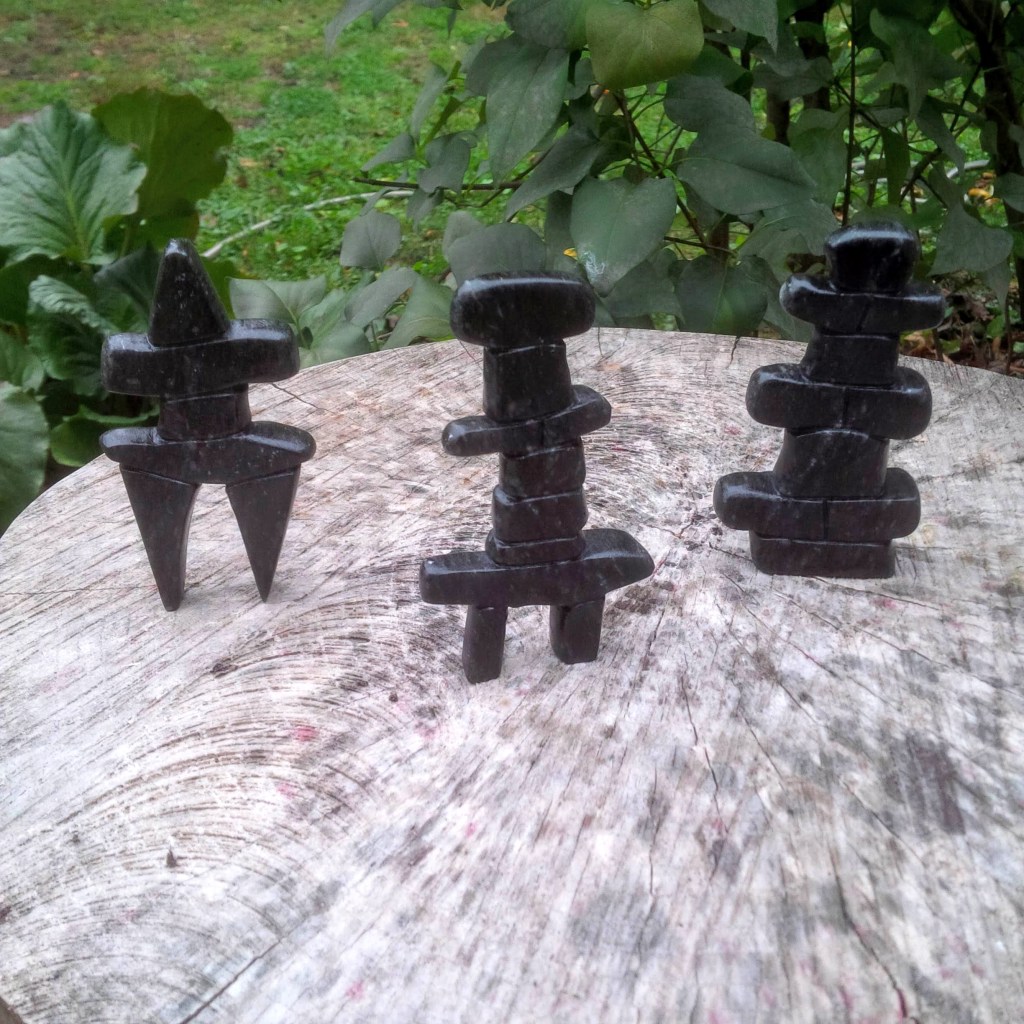
Stages of production of three Inukshuks – Christmas gifts for each of our kids.


2019
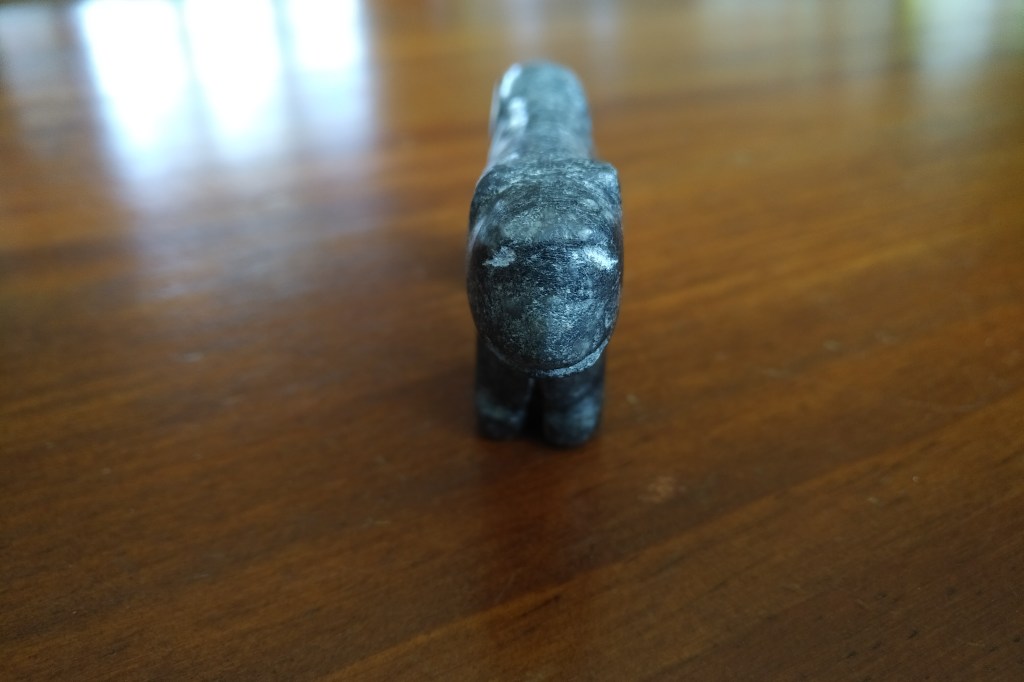
Little bear cub – quite simple – no real detail.

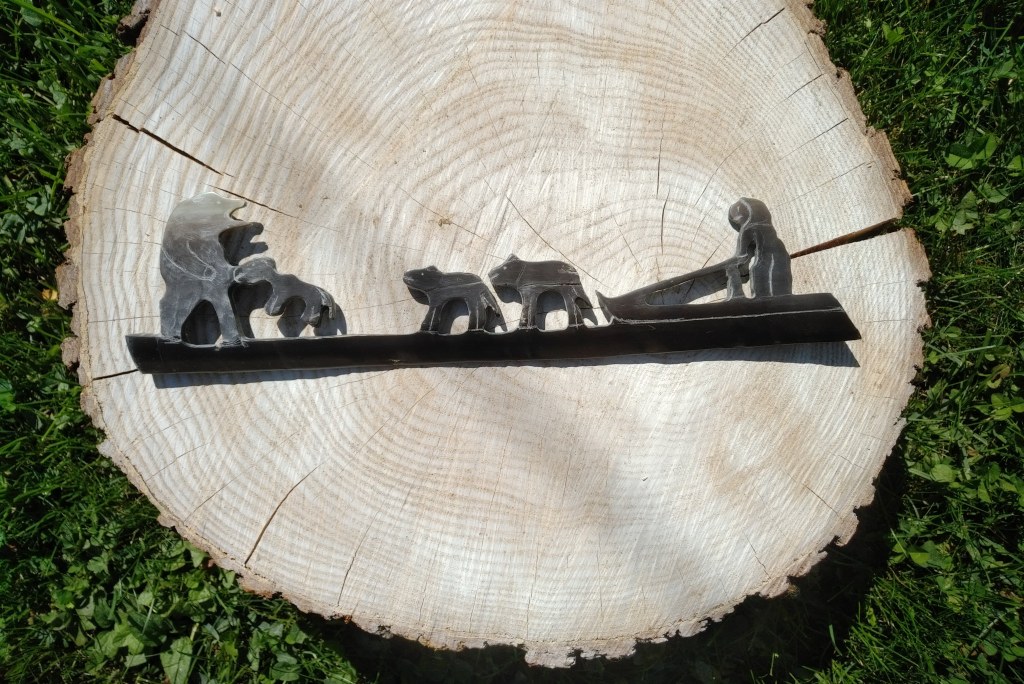
The Catch. The figure and the seal are from one block of stone and the kayak is from a different one.
The paddle, with small pieces of baleen wedged into the ends, and the “harpoon”
through the seal were made from shish cabob skewers.


2020
Going or Coming?: made from Lee Valley stone and finished with linseed oil.


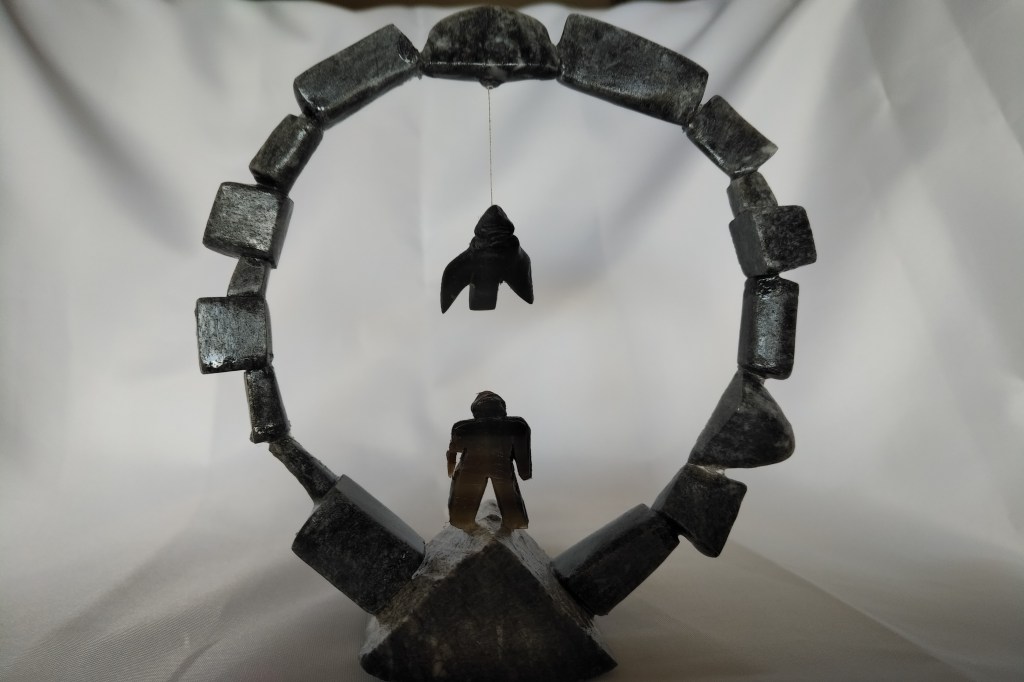
Stone Circle: I had a bunch of little pieces cut out from a few projects and as they laid out on the table
I rearranged them into a circle that reminded me of the stone tent rings I saw in Igloolik.
So step by step I glued the stones together. I then added the figure and the hanging raven,
both made from baleen. The raven is suspended by a strand of baleen fibre – this fibre is incredibly strong.
2021
Churchill (bear): a larger bear from Lee Valley stone. Gifted to a friend who named it Churchill,
after the area in Manitoba with a very large population (and migration) of polar bears.

Angekok Transformation: an “Angekok” is Inuktitut for “shaman” or “sorcerer” – there are a wide variety
of spellings in English for this word. The bottom half of the figure is “human” and the top half is to resemble a raven,
a very significant creature in Inuit culture. (Lee Valley stone).
Finished with linseed oil.

2022
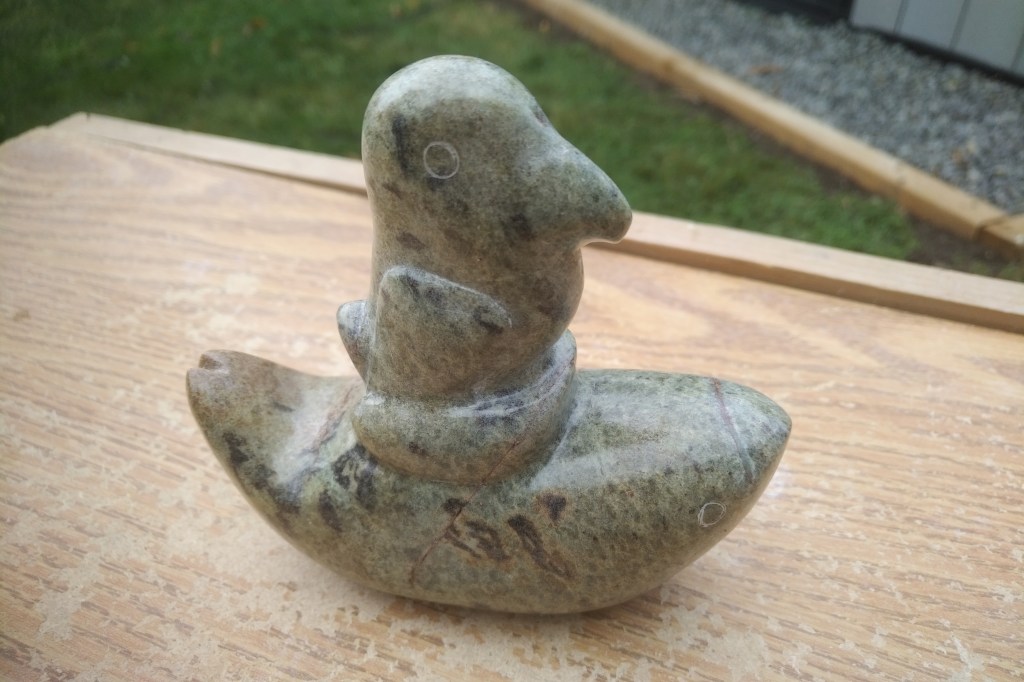
Puffin “whale-boarding”: the original plan was to have a person on top of the whale.
However, when carving the person a large chunk broke off that eliminated the possibility
of having a human figure. So I reshaped the figure into a resemblance of a puffin. Stone was Brazilian.

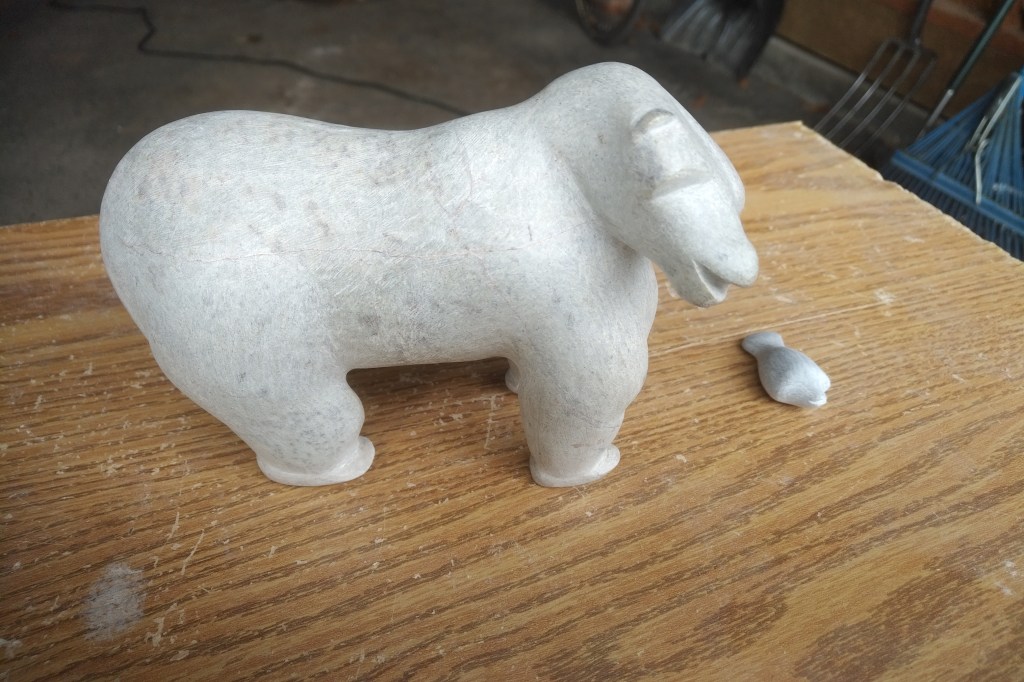
Seal with fish: the seal is from the Brazilian stone and the fish is Lee Valley stone.


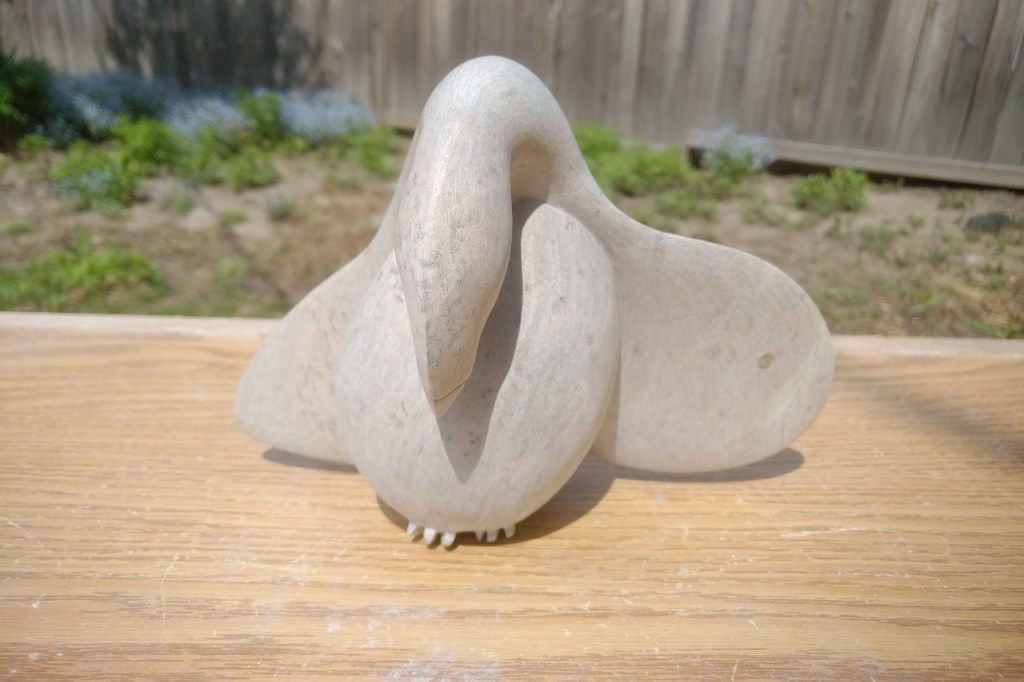
Liftoff (maybe?): Ptarmigans are referred to as “Arctic chickens”. They can hardly fly any distance
but provide a good food source in the north.
They have difficulty getting off the ground so they sort of drop the head and neck and then “launch” themselves upward. Brazilian stone.


NOTE: these are the first pieces finished with the clear Miniwax polish. This was suggested
by my source of stone and is much preferred to the linseed oil finish as
the wax maintains the “pattern” and colour of the stone better.
2023
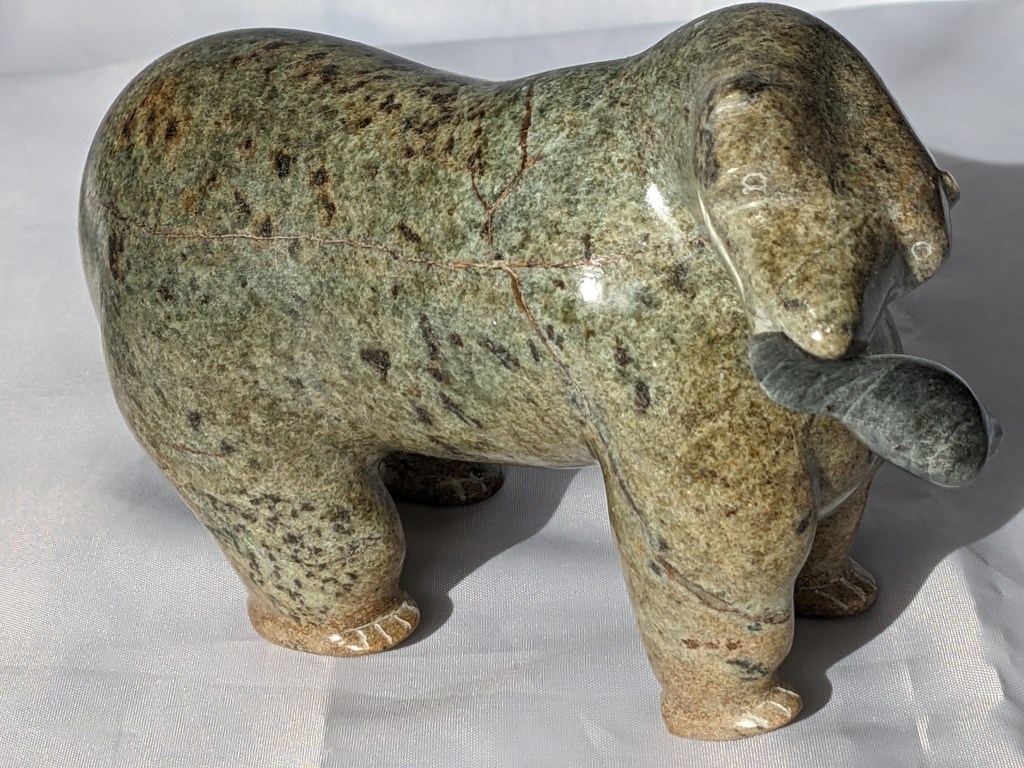
Bear with Seal. Having the head turned to the side was a new challenge and I was trying to reflect “movement and attitude”.
“This is my lunch so don’t even think about it”.


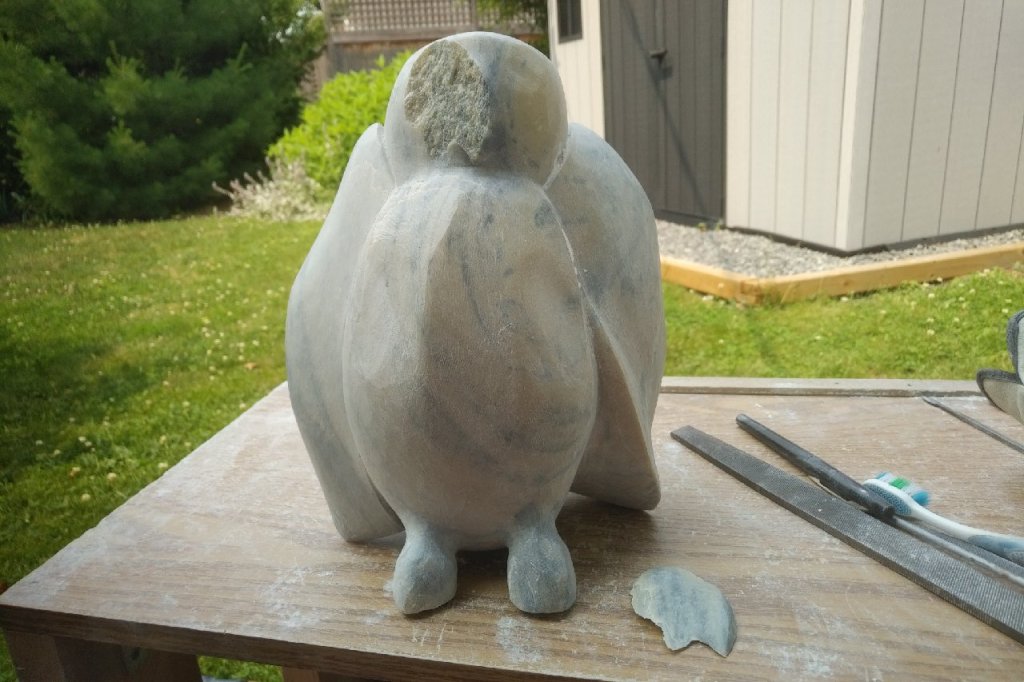
Snowy Owl. This is the largest sculpture I have attempted so far.
The piece stands about a foot high and weighs around 25 lbs.
The weight made it a challenge to work with so I would have a large towel or small pillow in my lap to rest the piece on.
When wet sanding I had the usual setup but I would wet the piece with a cup of water as the weight
made it impossible to dip into the bucket.
When nearing completion with final sanding half the “face” fell off. Yikes!! Fortunately, the broken piece came off whole,
so I glued it back on, finished sanding and then moved on to the polishing stage. Unless I point it out,
because of the nature of the stone, it is really not too noticeable.


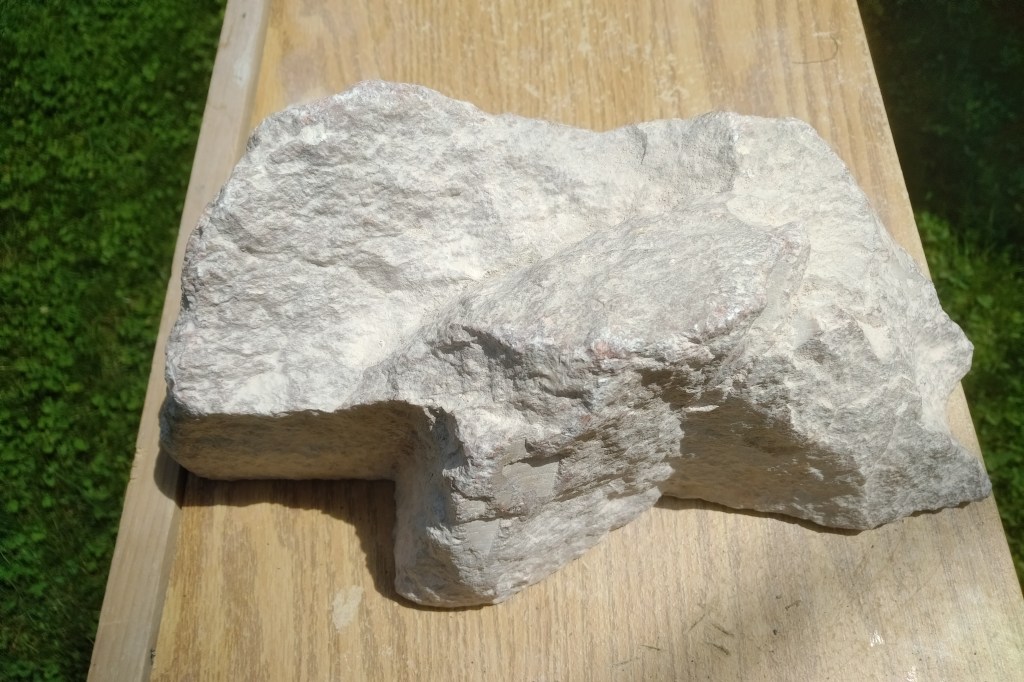
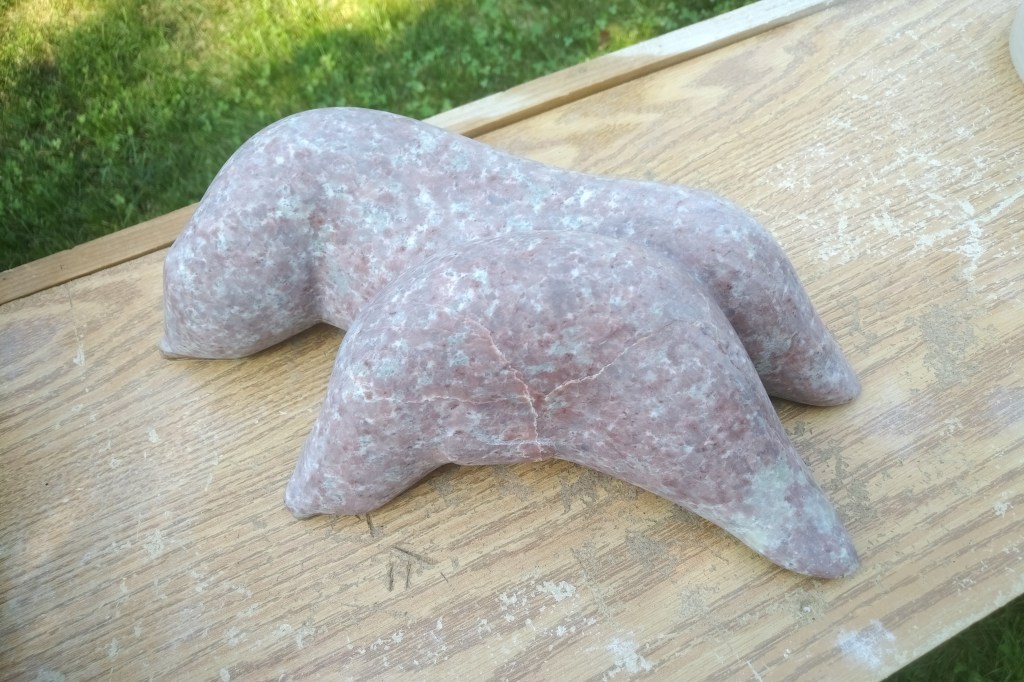
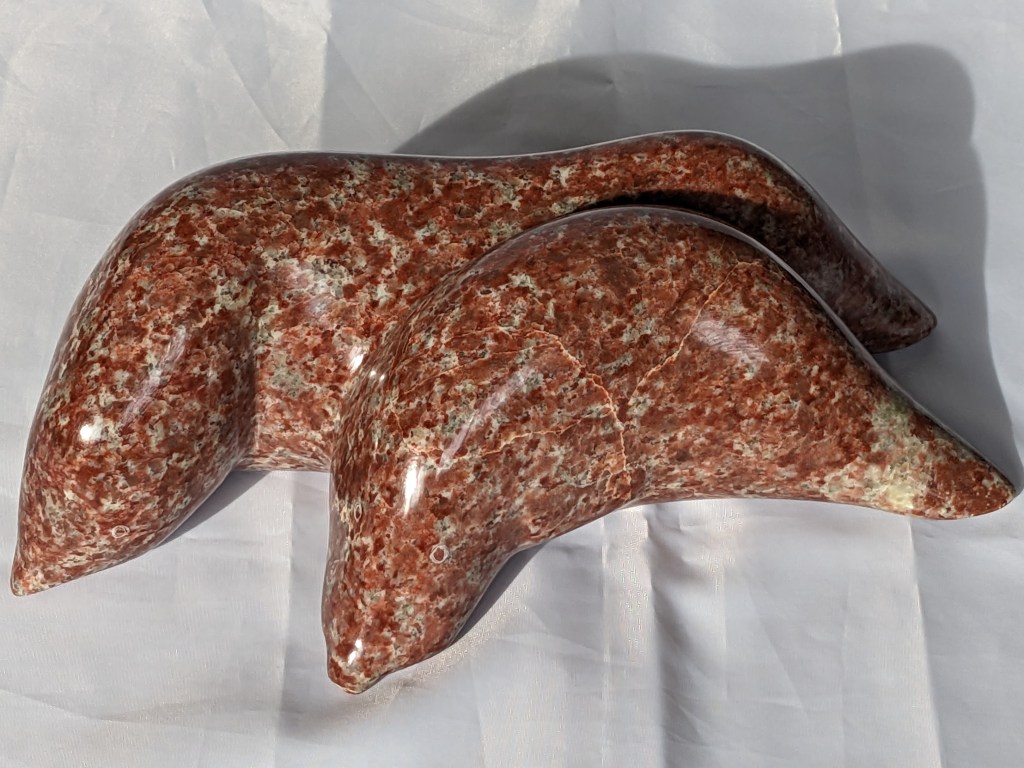
Swimming Seals. This was an unusual shape of stone and I had a little difficulty deciding what to do with it
but I thought the pattern of the stone lent itself to emulating seals.
I was really trying to capture “motion” with this one.
Inukshuk. I used pieces of the stones I worked on this summer and didn’t change the shapes
– sanded, polished and assembled.

Baleen.
The piece of Baleen I have is from a Bowhead whale.
Raven. Mounted on a Ringed Seal vertebral disc. (2018)

Bowhead Whale. Mounted on a Bowhead whale vertebral disc. (2018)

Nanook 1, dogs 0. Carved from Bowhead Whale baleen plate. (2020)
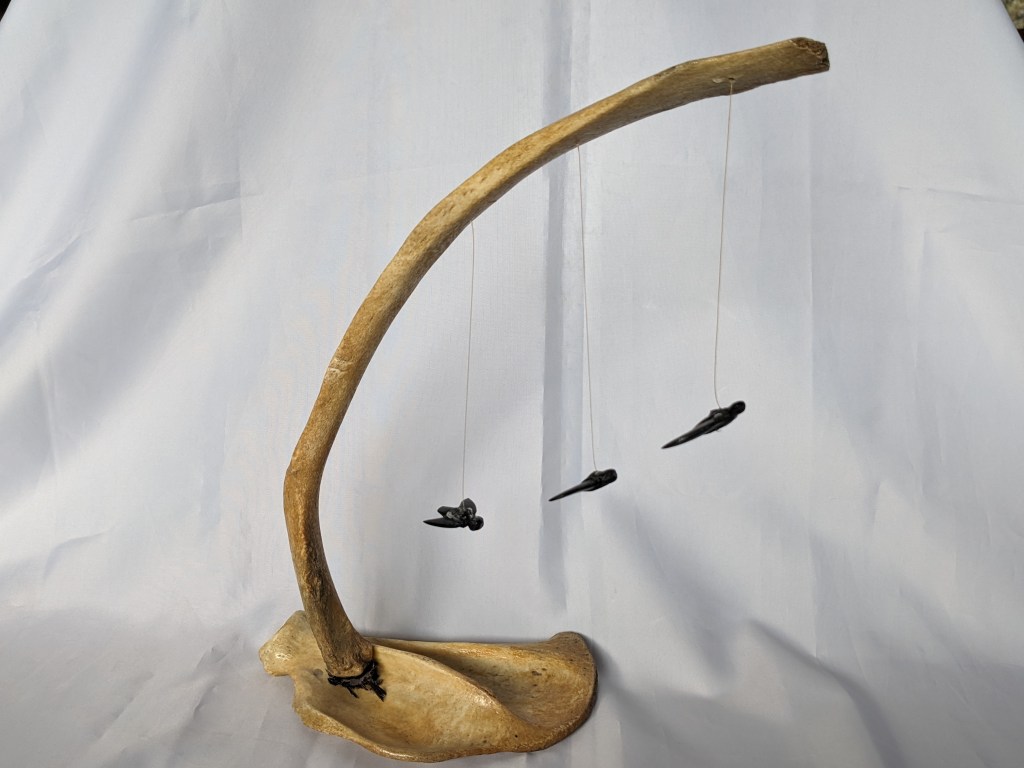
Three Ravens. The base is a Ringed Seal scapula and the arcing bone is a Ringed Seal rib.
The three birds are made from baleen and are suspended by baleen fibre. (2018)
Snowy Owl. Beluga Whale vertebrae, baleen eyes and beak on soapstone stand. (2023)

Gallery


Thank you for visiting my site.
Please send any comments or questions to kabloona8@gmail.com
